LODESTAR
User manual · lodestarvtt.com
What Lodestar is
Lodestar is a battlemap display tool for game masters. You run it from one browser window (the GM screen) and cast a second window (the player display) to a TV or second monitor. The GM sees everything; the players see only what you reveal.
Everything runs locally in your browser — no account, no cloud, nothing uploaded. Your maps live in your browser's storage on your own machine. It works fully offline once loaded.
Getting started
- Open Lodestar and click Enter on the welcome screen.
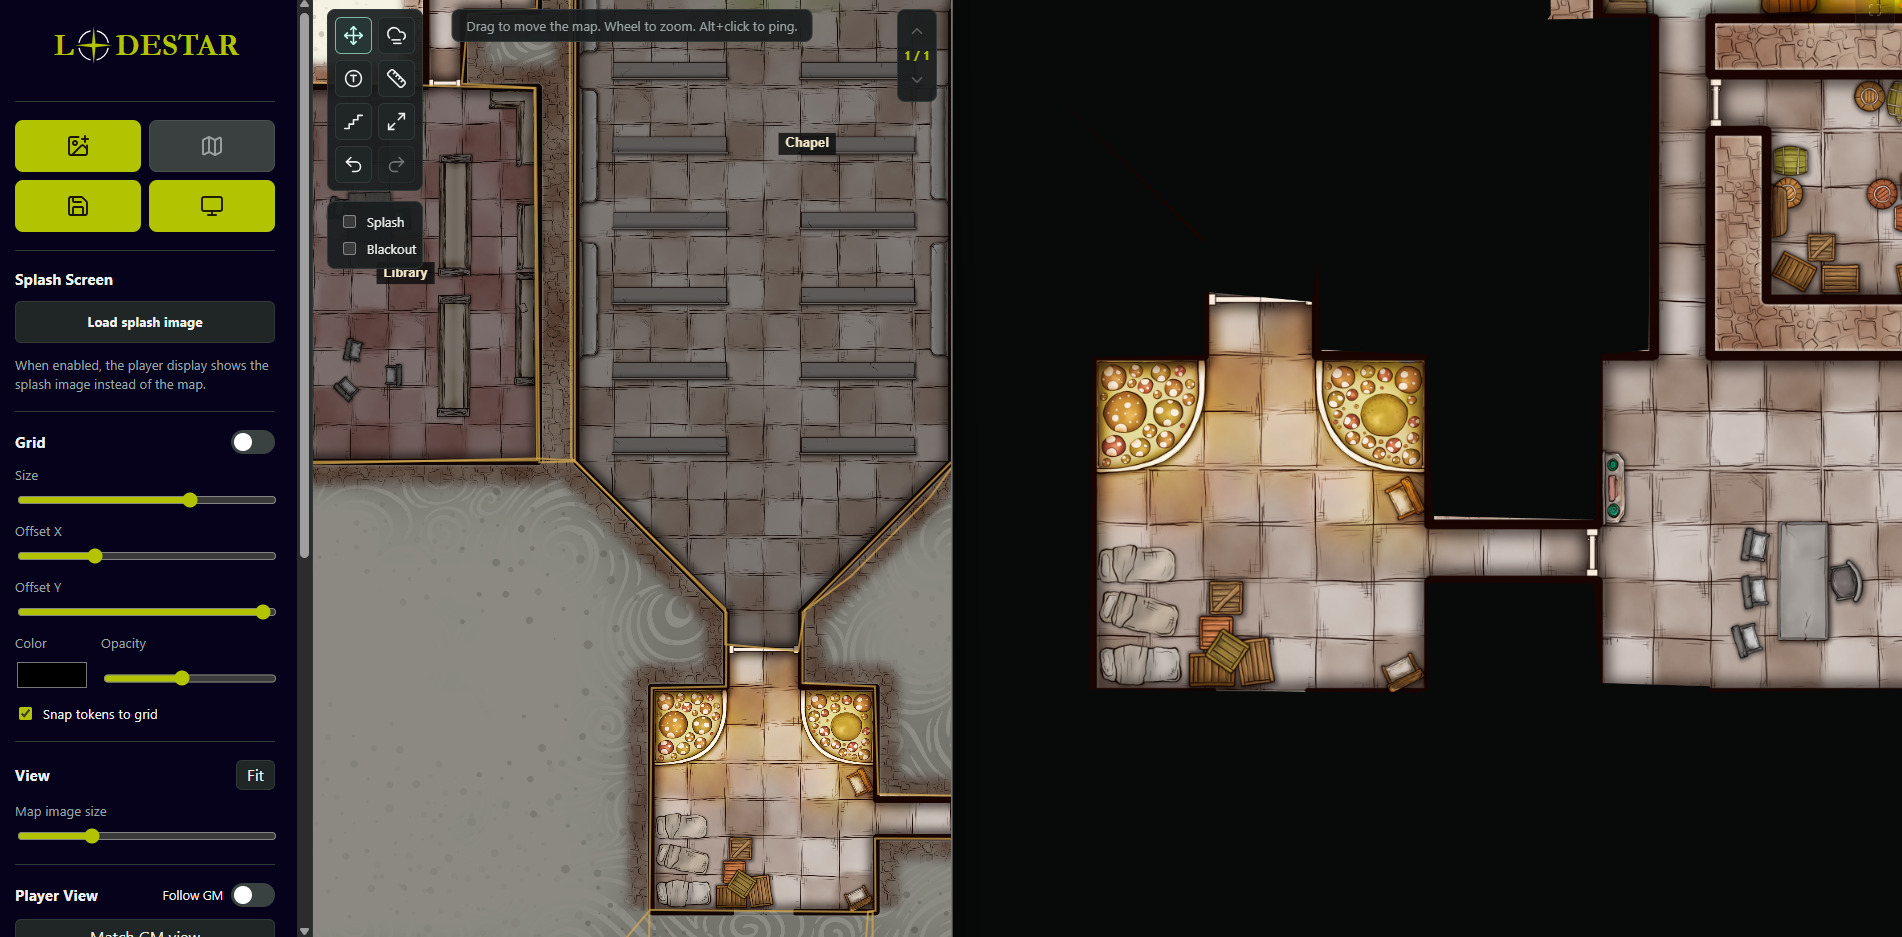
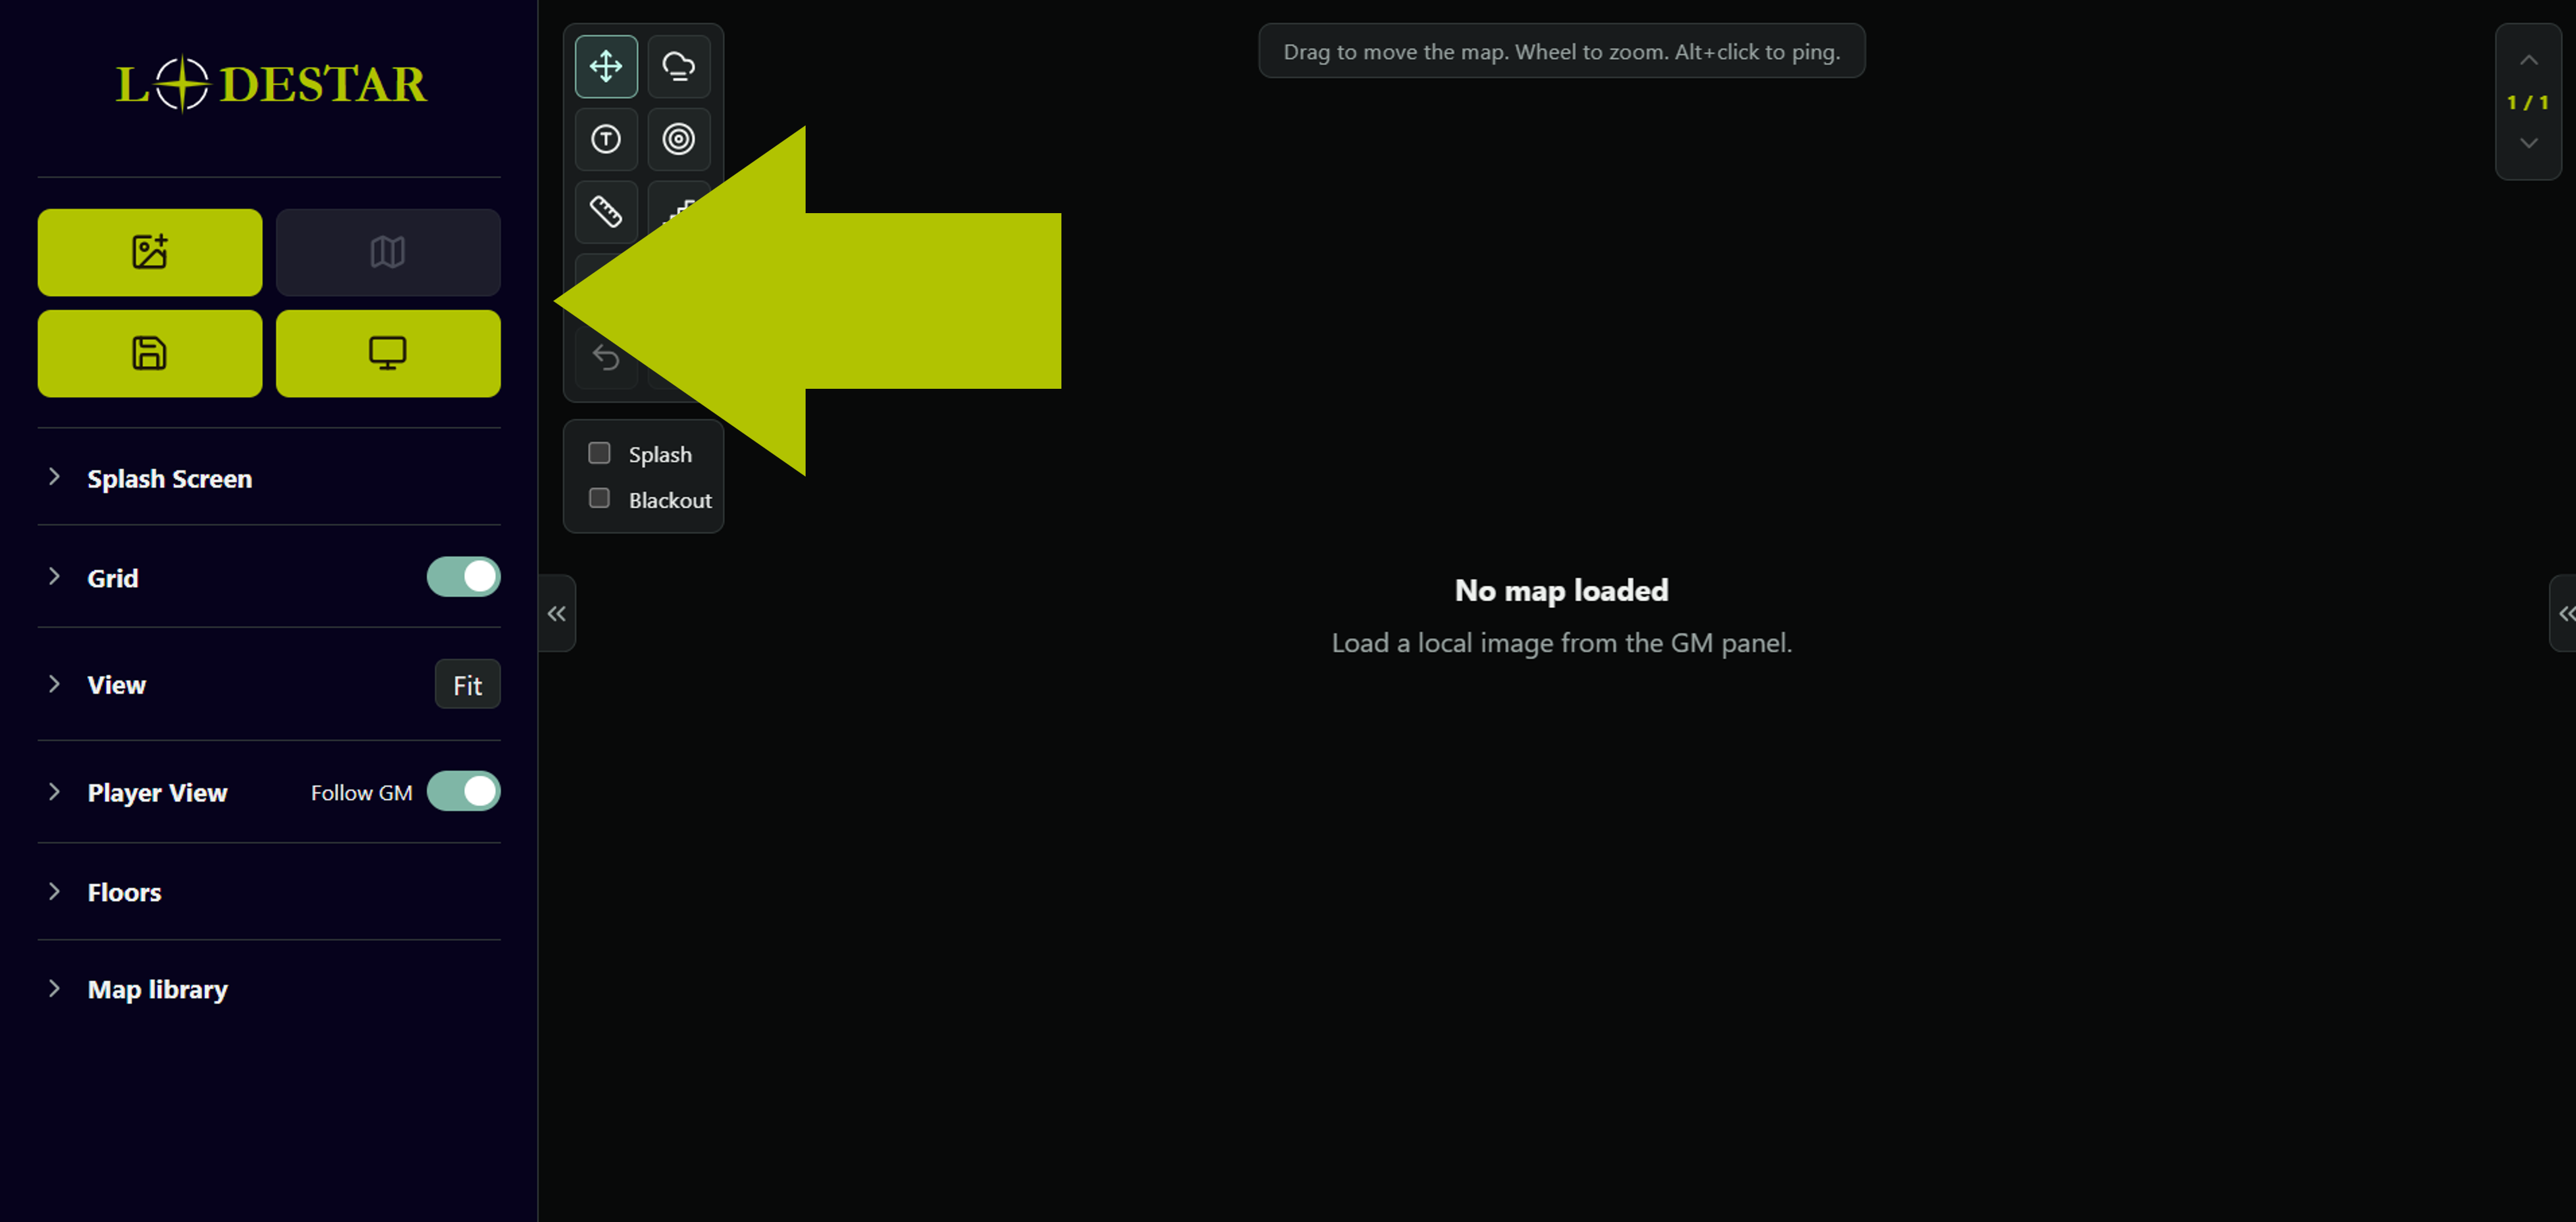
- In the top of the left panel, click the Load map button (the image icon) and pick a map image from your computer.
- The map appears. Use the mouse wheel to zoom and drag to pan. Press F (or click Fit) to frame the whole map.
The left panel is organised into collapsible sections (Grid, View, Player View, Floors, Map library). Click a section title to open or close it. You can hide the whole panel with the tab on the left edge of the map to give the map more room.
The player display ↑ top
Click Open player display (the monitor icon at the top of the panel). A second window opens — drag it onto your TV or second monitor and press F (or double-click) to make it fullscreen.
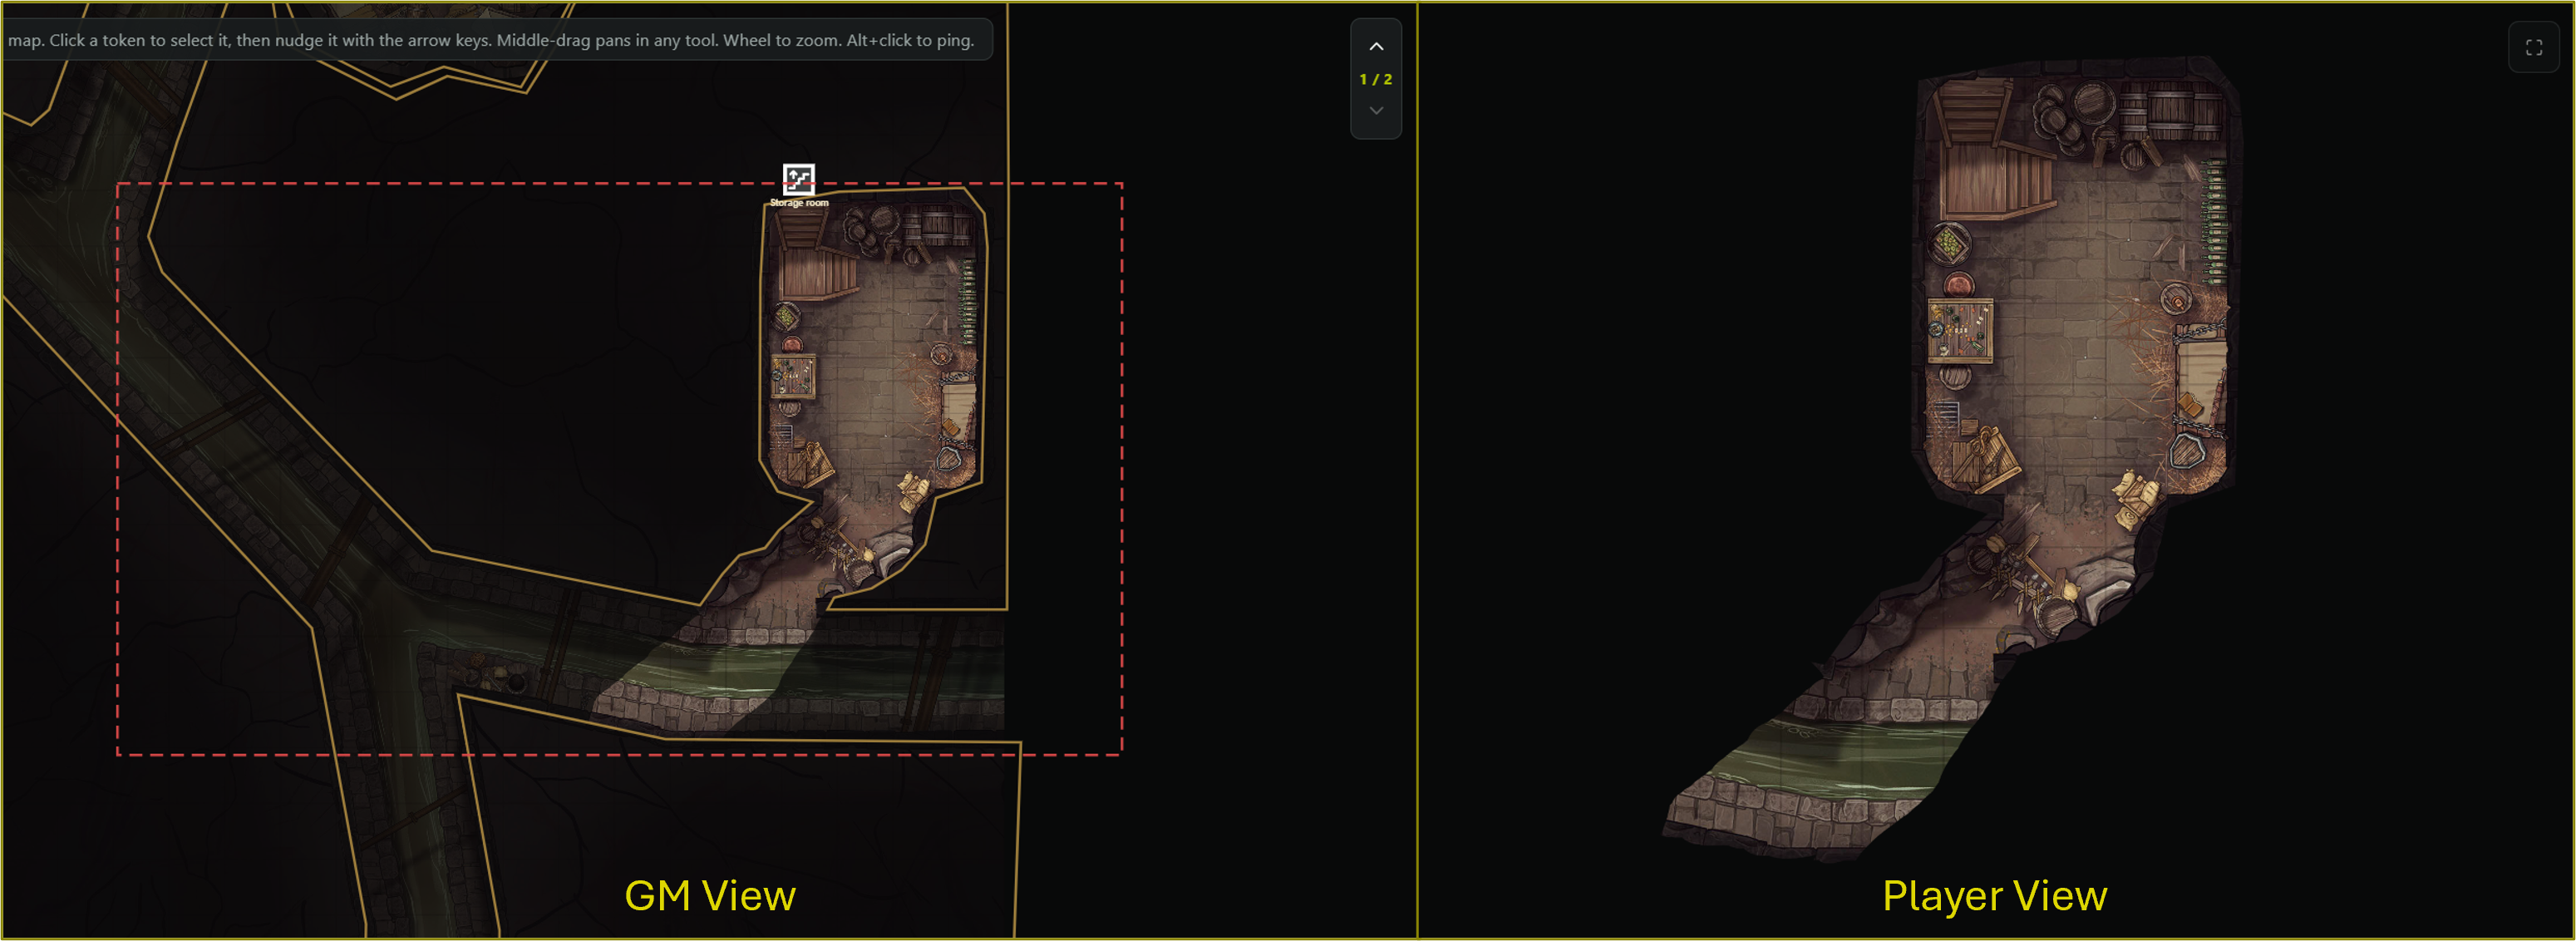
The player window shows the same map, but with fog as solid black and none of your GM-only tools. By default it follows your view; a red dashed rectangle on your GM screen shows exactly what the players are currently seeing.
- Follow GM (Player View section): when on, the player screen mirrors your pan/zoom. Turn it off to frame the players' view independently.
- Match GM view snaps the player view to your current framing once.
- You can drag the red frame itself to pan the players' view without moving your own (see Rotating & the player frame).
Grid & calibration ↑ top
The Grid section toggles the square grid and adjusts its size, offset, colour, opacity, and token snapping.
Calibrate to a map's own grid
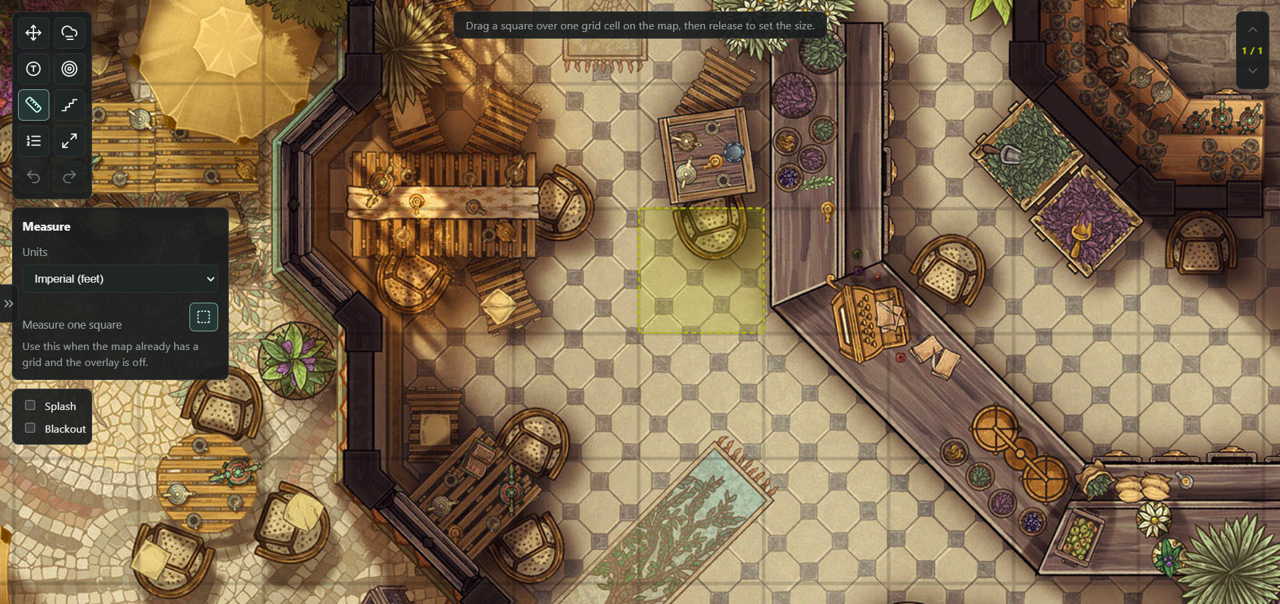
If your map already has a printed grid, you don't have to match it by hand. Click the small square-dashed button next to the size slider (it's also in the Measure tool), then drag a square over exactly one cell of the map. Lodestar sets the grid size and lines the grid up to that cell, so tokens snap onto the map's own squares — even with the grid overlay hidden. The ruler is calibrated at the same time.
Fog of war ↑ top
Click the fog tool in the toolbar to open the fog ribbon. Fog hides the map from players; you cover areas and clear them as the party explores. Tokens and images sit under the fog, so anything in a hidden area is concealed.
- Fog area — click corners to trace a polygon, Enter to place. Named area adds a GM-only label.
- Fog shapes — drag to drop a rectangle, square, ellipse, circle, or triangle.
- Paint — brush fog on freehand (adjustable round/square brush; [ / ] resize it).
- Bucket — fill the entire map with fog at once.
- Erase — wipe brush/bucket fog away; you can paint back over an erased spot normally.
- Right-click a polygon area to remove it and clear the brush/bucket fog inside it (other polygon areas are left alone).
- Clear all fog empties everything.
On your GM screen fog shows as an adjustable tint so you can still see through it; players see solid black.

Tokens ↑ top
Select the Tokens tool. Click to drop a token, drag to move it, right-click to remove it. In the token options you can set a colour, a 1–4 cell size, a short label, or load a custom image.
Bulk-add: use "Add image tokens" in the token options and multi-select several image files — Lodestar drops one token per image in a tidy grid for you to arrange.
In Move mode you can drag a token to move it, or click it once to select it. A selected token shows eight pop-out orientation arrows — click one to step a cell in that direction, including diagonals; the keyboard arrow keys nudge it too (Delete removes it). As you step it, Lodestar traces the actual path and shows the distance moved, counted with the D&D 5e alternating-diagonal rule (every other diagonal costs an extra square). Dragging with the mouse shows the distance as well. Tokens snap to the grid and appear on both screens.

Images, notes & PDFs ↑ top
Map images
Drag an image file straight onto the map (or use the image button in the map toolbar) to drop it as a movable picture — handy for handouts, props, or overlays. In Move mode, click it to select; a transform box appears: drag the corners to resize (aspect ratio is kept), grab the ball on the stem above it to rotate, and tick Show to players to reveal it on the player display (hidden by default). There's also a Snap images to grid option in the View panel.
Notes
The note tool (sticky-note icon in the toolbar) drops a GM-only beige note where you click. Type straight into it; a small toolbar floats above the focused note with a font picker, size, and bold / italic / underline / strikethrough. Drag the title strip to move it, drag the bottom-right corner to resize, and use the × to delete. Notes are sized relative to the grid and scale with the map, and they never appear on the player display.
PDF resources
The PDF button opens one or more local PDFs (character sheets, stat blocks, rules) in floating, draggable, resizable windows — GM-only. Use Swap to load a different file into a window, and × to close it. PDFs live only in the current tab: they're never synced to players or saved into a map.

Area of effect ↑ top
The Area of effect tool shows a live spell template that follows your cursor on both screens — a circle, cube/square, or cone. Pick the shape and a size in feet (presets or a custom value), and choose a colour. The cone rotates with the mouse wheel or the direction slider. It's a preview that follows the cursor, not something you place.

Measure & ping ↑ top
- Measure — drag to measure distance; it reports grid cells and your choice of feet or metres. (If the map has its own printed grid and the overlay is off, calibrate the ruler with the drag-a-square button.)
- Ping — hold Alt and click anywhere to drop an animated marker on both screens — great for "look here".
Initiative tracker ↑ top
Open the initiative tracker from its toolbar button (the numbered-list icon) or the retract tab on the right edge of the map. Add players, NPCs, and monsters with an initiative score and HP. Advance turns and rounds with the arrows, track damage and healing with the HP bars, and click a name to set the current turn.
A compact order overlay can sit in the corner of the screen:
- The GM toggle shows it on your screen; the Players toggle mirrors it to the player display.
- It stays visible even when the full panel is retracted, and has its own ‹ / › arrows to move through the round without reopening the panel.
Link a character to its token
Each row has a small crosshair button that ties the character to a token on the map:
- Click the crosshair, then click a token on the map to link them. The token takes on the row's colour and a short label from the name.
- Once linked, the crosshair lights up — click it again to locate that token (the view centres on it and it pings). Alt-click the crosshair to unlink.
- The token of whoever's turn it is wears a glowing turn ring on the battlefield, so the table can see who's acting at a glance. The ring follows the same Players toggle as the order overlay.
Concentration
Each row also has a small K button that marks a combatant as concentrating on a spell. Click it to toggle the state on or off — it lights up when active. The state mirrors as a small K badge next to the combatant's name in the order overlay, on both the GM and player screens.

Music & sound ↑ top
Open the music panel from its toolbar button (the musical-notes icon). It docks above the initiative tracker on the right and runs three layers that all play together: a looping Music track, a looping Ambiance bed underneath it, and one-shot SFX stings on top.
- Music & Ambiance. Each is an independent looping layer — load a clip with the download-arrow button, then play / pause it. Run a soundtrack on the Music layer and an environment loop (rain, tavern, wind) on the Ambiance layer at the same time. Leave Loop on for beds or off for a single play-through, and each layer has its own volume slider.
- SFX. Load one or more clips and they appear as a tight grid of soundboard pads — click a pad to fire that effect as a one-shot over the beds. They share one volume slider. Hover a pad and a small × appears in its corner to remove it.
- Scenes. Once the layers are loaded the way you like, press + Scene to save that whole mix (both beds and the SFX set) under a name. Click a scene chip to recall it instantly (the beds swap in paused, ready to play). To remove one, select its chip and use the Delete button at the top of the panel — it only lights up once a scene is selected, so you can't delete one by accident.
Everything is mirrored to the player display, so the table hears it too. Because browsers block audio until the window has been clicked, the first time a track starts the player display shows a one-time “Click to enable table audio” button — click it once and audio flows from then on. Loaded audio lives in this browser tab only; it is not bundled into saved maps.
Rotating & the player frame ↑ top
Rotate the map
In the View section, the Rotate map arrows turn the whole battlemap in 90° steps — fog, tokens, and stairs all rotate with it, and the players follow. You can also rotate just the player view (Player View section) so the map reads right-side-up from across the table, without rotating your own screen.
Drag the player frame to pan the TV
The red dashed rectangle is what the players see. In Move mode you can grab it and drag it to pan the player display in real time — perfect for following the party around a large map without touching your own view.

In-person play on a TV ↑ top
Lodestar is built for playing in person with a TV laid flat as the battlemap and physical miniatures on top. The player display becomes the tabletop; you drive it from your laptop.
- Open the player display and put it fullscreen on the TV.
- Turn Follow GM off so the TV has its own framing.
- Zoom the player view until one grid square on the TV matches the footprint of your minis.
- Tick Lock square size on player screen (IRL TV) in the Player View section.
From then on, the square stays that exact physical size across maps. Different maps have different resolutions, so when you load a new one you just calibrate its grid (drag a square over one cell) and the player zoom adjusts itself automatically — your minis always match. The setting is remembered between sessions. Drag the red frame to slide the visible area around as the party moves.

Floors, stairs & splash ↑ top
- Multi-floor: build multi-level locations — each floor has its own map, fog, tokens, and images. Use the ↑ / ↓ arrows in the map area to switch floors.
- Stairs: once you have at least two floors, place GM-only staircase markers that link them — click a stair to jump to the floor it leads to. Their colour is adjustable in the Floors section; players never see them.
- Splash / blackout: show a splash image or a plain black screen on the player display instead of the map — handy between scenes.
Saving & backups ↑ top
Click Save map to store the whole setup (image, grid, fog, tokens, floors, views) in your browser's local library, and My maps to load one back.
Everything is stored in your browser on your computer — nothing is uploaded. Because of that, a saved library only appears in the same browser, on the same device, at the same address you saved it from. Clearing your browser's site data erases it.
For anything you want to keep or move between machines, use Export in the panel to save your whole library to a single JSON file, and Import it wherever you need it. That exported file is the one copy that doesn't depend on a browser setting — it's the safe way to back up.
Keyboard shortcuts ↑ top
You don't have to memorise these — press ? or click the ? button at the bottom-left of the map to pop the same cheatsheet up inside the app at any time (it also has a link to open this manual).
| V | Move / select |
| P · N | Polygon fog · Named fog area |
| B · E | Paint fog · Erase fog |
| T | Tokens |
| A | Area of effect |
| M | Measure |
| S | Stairs |
| F | Fit map to screen (and fullscreen on the player window) |
| Arrow keys | Pan the map (when no token is selected) |
| + · - | Zoom in · out |
| [ · ] | Brush size down · up |
| Ctrl+Z · Ctrl+Shift+Z | Undo · Redo |
| Alt+click | Ping |
| Middle-mouse drag | Pan in any tool |
| Right-click | Delete a token, fog area, image, or stair |
Tips & troubleshooting ↑ top
- The player window must stay open for the red frame and casting to work. If it closes, just open it again.
- My saved maps disappeared. A library is tied to one browser, device, and address. Maps saved on the hosted site won't show in a downloaded copy (a different address), another browser, or a private window. Use Export/Import to move them.
- Big map images load and run fine locally, but very large files make the saved library and exports large. Resize enormous images first if backups feel heavy.
- Works offline. Once the page has loaded once, you can run a whole session with no internet.